
Mould Resistant Wall Tile Grout
EVO-STIK Mould Resistant Wall Tile Grout is a fast-setting and mould resistant cement-based grout that is suitable for finishing joints in internal and external ceramic tile installations. When set, it is completely waterproof and will not wash out of joints, making it ideal for use in areas subject to frequent wetting and condensation such as power showers, kitchens and bathrooms.
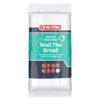
White
Product overview
EVO-STIK Mould Resistant Wall Tile Grout is our best anti mould grout designed to stay cleaner for longer. It's a cement-based white wall tile grout that resists mould, sets quickly, and delivers a long-lasting finish - perfect for anywhere moisture likes to linger!
The rapid-setting formula helps you finish your project sooner, making it a great pick for both beginners and experienced tilers. Once set, this mould resistant tile grout is completely waterproof and won’t wash out of joints, even in areas with constant wetting or condensation such as power showers, bathrooms and utility rooms.
Use EVO-STIK Mould Resistant Wall Tile Grout on rigid, clean surfaces both inside and outside the home. The tough, durable formulation ensures long-lasting results in demanding environments and is even frost-resistant.
Suitable for ceramic, stone and porcelain tiles with grout lines of up to 3mm wide.
Suitable materials: Grouts tiles on to most interior and exterior surfaces provided they are rigid and clean.
Suitable tiles: Ceramic, stone & porcelain tiles.
Sizes: 500g, 1.5kg.
Coverage: 2.5m² - 7.5m² dependent on unit size.
Features & benefits
-

Our best anti mould grout for ceramic, stone and porcelain wall tiles
-
Sets in as little as 3 hours
-
For grout joints up to 3mm wide
-
Suitable for kitchens, bathrooms and shower walls
-
Waterproof and frost resistant
-
Easy to apply - mix with water
-
For interior & exterior use
Downloads & resources
Mould Resistant Wall Tile Grout - Technical Data Sheet (444.28 KB)
This file is stored on an external website, please follow the link
Watch video
How to use
Preparation
1. Make sure all grout joints are dry, clean, and dust-free. Let your tile adhesive fully dry before you start grouting.
Application
2. Mix only what you can use in about 20 minutes (around 500g). Throw away any leftover once it starts to go off.
3. Add cold water to your bucket first, then slowly mix in the powder (3.5 parts powder to 1 part water) until you get a smooth, creamy paste with no lumps.
4. Let the mix rest for 2 minutes, then give it a quick stir. Don’t add more water after this point.
5. Standing on the centre of your tiles, apply the grout with a grout float or spreader, making sure each joint is fully filled.
6. Press the grout firmly into the joints and wipe off any excess as you go using a warm, damp sponge.
7. Lightly wipe diagonally across the tiles with the sponge - gentle pressure helps keep the joints neat.
8. Leave the grout to dry for at least 3 hours, then polish the tiles with a clean, dry cloth.
9. If working outdoors, protect the area from bad weather or extreme temperatures until the grout is fully hardened.
How to remove
- Wipe away any extra grout straight away using a damp cloth or sponge.
- Clean your tools and equipment immediately with warm, soapy water to stop the grout from sticking.
Once hardened, grout is much tougher to remove:
- Carefully scrape away dried residue from the tile surface using a plastic scraper or a grout haze remover designed for tiles. Work gently to avoid scratching the tiles, especially with glossy or delicate finishes.
- For stubborn haze, use a damp microfibre cloth and a suitable grout-cleaning solution, following the product’s instructions.
Always test any cleaning product on a small, hidden area first - especially with natural stone tiles.
Find new, smarter ways of doing things
Find out what product you need, how to use it and where to buy it.
PRODUCT FINDER